Repairing a Leaking Hose Bib
 Repairing a leaking hose bib shot to the top of the list recently. I experienced an over usage fee on my water bill. I didn’t know that it was leaking at the time but when the bill came I started searching for a leak. In my backyard I had extended my water lines and added several hose bibs, there I found the problem.
What’s in a name?
There are many names associated with this valve. It can be called a spigot, faucet, bib, or valve. You can add hose or garden to the name of choice. Anything you want to call them they all do one thing. They block water from coming out unless you turn the handle to open them and let the water come out. They are located inside the home and outside the home. Also sooner or later they will start to leak. They can leak from several places. This article is about an outside valve that leaked and needed repair.
Leak detective?
I didn’t know what kind of leakage problem I had on my hands. I simply found a spot near the hose bib where it was extremely soft and wet. My sprinkler system had been shut down for the winter so any leaks due to sprinklers were out of the question.
I shut off the water to the affected water line and waited for the ground to dry up enough for me to dig. I dug down to where the pipe for the hose bib went from horizontal to vertical. It was cleared enough to allow me to see any water seepage at all the joints in the area. I removed the hose from the hose bib and made sure the hose bib was fully closed. I then asked my wife to assist me. She turned the water back on while I looked for leaks.
Leaks in surprising places
I had not thought that I would have a leaking hose bib. I thought maybe a crack or a bad joint at a PVC fitting was going to be the leading candidate. As soon as the water pressure pushed out any air in the line the water started to drip out of the hose bib. Darn, all that digging for nothing. Anyway, it turned out to be a simple thing like replacing a hose bib or repairing it. I chose to repair it.
Which way do I go?
Replacing a hose bib is super simple. Turn off the water. Drain the line of pressure. Use two wrenches to remove the hose bib. One wrench to hold the water line another to turn the hose bib. Replacement costs for the hose bib will run from a few bucks up to twenty dollars depending on the type you have.
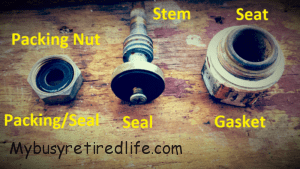
Repairing a hose bib requires more time but it can pay in savings. There are only three seals in my hose bib. A seal that prevents water from coming out of the hose connection(my problem). A seal or packing in the packing nut that prevents water from leaking out of the handle/stem area. Also, a gasket where the two parts of the hose bib body screw together.

Bent nose hose bib
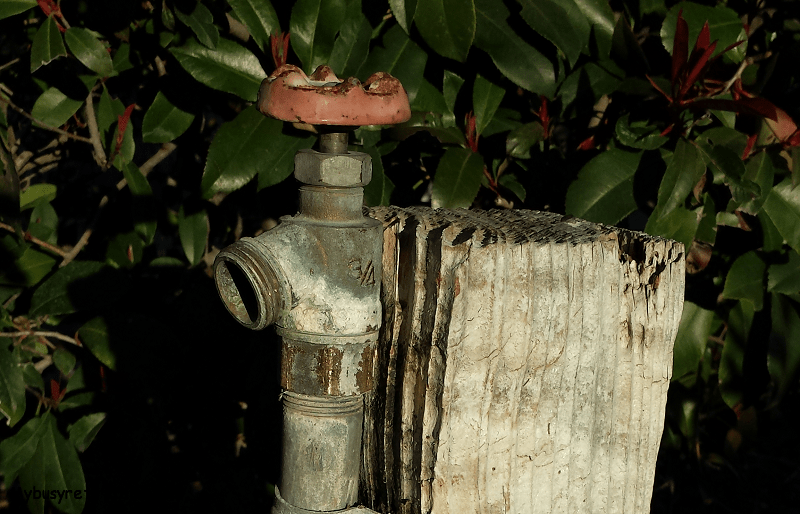
The hose bib I was working on is called a bent nose hose bib or garden valve. It is perfect for a pipe that comes out of the ground vertically. It also has a larger opening internally over the other styles of valves/bibs. So this valve will deliver more water because of that large opening.

I removed the hose bib from the pipe and used my workbench with a vise to take it apart. I needed to check which part needed replacing. If the seal was bad I can easily replace it. It is held in place with a single bolt. If the seat(which is part of the lower brass part of the valve) is bad then I would need to replace the entire hose bib.
Some valve seats have a flat machined surface and can be resurfaced with a simple tool. The seat on my valve is not flat but has a double taper. That makes it not serviceable.
How to test what is bad
It is a pretty simple test of the valve parts. Once the seat is separated from the main body of the valve you run a finger over the surface where the seal will touch and create a watertight seal. If the seat is rough in spots it’s time to replace the entire valve.

To test the seal run your fingernail along the seal. Run it along the surface where it touches the seat. If the seal is rough it is time to replace it provided that the seat is smooth.
What if water had leaked out of the stem?
If water had leaked out of the stem this is a super simple fix. The stem’s packing is held in a threaded piece(called a packing nut). If water leaks use a wrench to tighten the packing nut. About a 1/8 turn will usually do it. Did I mention that a slight tightening will usually do it? No need to remove the valve. This change is best done under pressure. The packing nut squeezes the packing when tightened. The packing squeezes against the stem which creates a watertight seal. You can see the leak stop as you make the adjustment.

Disassembly
How to disassemble the bent nose valve. Before removing the valve turn off the water and open a couple of valves to allow the pipes to drain.
- Remove the valve/bib from the pipe.
- Loosen and remove the screw on the valve handle.
- Remove the handle.
- Loosen and remove the packing nut, stem seal, and washer.
- Use two pipe wrenches or groove joint pliers to take apart the main body.
- Turn the stem until it can be removed from the main body.
- Inspect the parts as per above.
- Replace the part(s) that are needed.
Conclusion
I replaced the seal but could not find the packing/seal or the gasket for the main body. If I could have found those parts I would have replaced them. I assembled the valve and tightened the two body parts. The packing nut was hand tightened to start. I put pipe dope on the pipe threads to get a good seal on the pipe. After installation and under pressure I tightened the packing nut gradually until it stopped any water leaking from the stem.
The entire cost to repair the valve was one dollar for the new seal.
Related Articles: Plumbing Articles
(Mybusyretiredlife.com All Rights Reserved)
(Mybusyretiredlife.com All Rights Reserved)
(Mybusyretiredlife.com All Rights Reserved)
(Mybusyretiredlife.com All Rights Reserved)
(Mybusyretiredlife.com All Rights Reserved)
(Mybusyretiredlife.com All Rights Reserved)
(Mybusyretiredlife.com All Rights Reserved)
