Defrosting the chest freezer

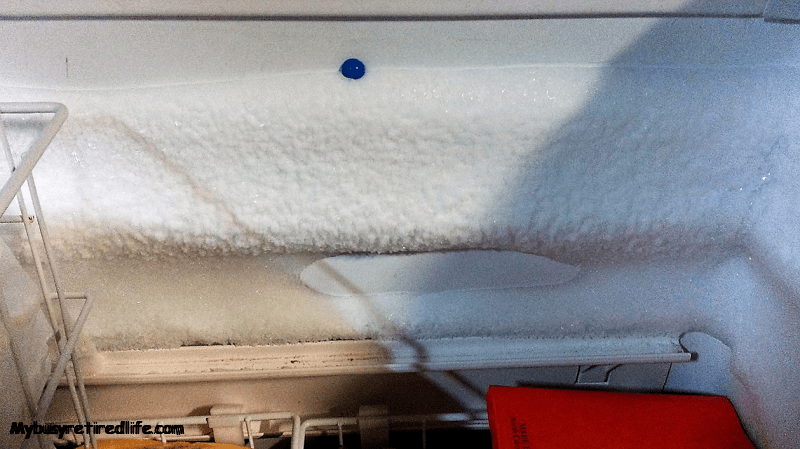
Freezer in need of defrosting
I had to defrost the freezer the other day. It reminds me why I have a freezer that does not defrost automatically. It all comes down to the condition of the items in a freezer that does not have automatic defrosting over one that does.
How it works
It seems that automatic defrosting has become commonplace and not the exception. While automatic defrosting will simplify your life it does bad things to the items stored in your freezer. This happens because the defrost cycle goes on, up to four times a day. Each time the auto defrost cycle comes on the freezer goes from near zero degrees up to thirty-two degrees. Auto defrost can cause the items in the freezer to partially defrost. Then they freeze again which leads to ice crystal formation which can lead to freezer burn.
Why a Chest Freezer
I chose a chest freezer because it is the most energy-efficient type of freezer. Every time you open the door on an upright freezer all the air in the freezer spills out to the floor. All that zero temperature air is replaced by room temperature air. When you close the door, the freezer has to drive that air temperature down to zero degrees. A chest freezer because it opens from the top does not lose that zero degree air.
Why a Manual Defrost
No auto defrost means less energy used heating the coils in the freezer to control frost and keep up temperatures during the defrost cycle. As an added bonus because there is less equipment in the freezer and not so many people want manual defrost it is less expensive. What I find extremely useful is that my freezer has a manual switch that I can use to heat the cooling coils and quickly defrost the freezer. This is usually done in about fifteen to twenty minutes(more on this later).
Defrosting Technique
For defrosting my freezer, I open the door I do not remove the items. I pull out the defrost switch and it starts heating the cooling coils. With a bucket on hand and a narrow plastic scraper, I wait for the coils to loosen the frost buildup. I then use the scraper to break loose the frost from the freezer wall. Now I need to clarify that the frost builds up only in the upper half of the freezer. The bottom doesn’t build up frost. So I only have two rows of frost to remove.
Let the freezer do the work
Once the frost starts to loosen I move stuff away from the area I’m working on. I chip away(pry it off the wall) at the ice so that it comes off the wall in large sections. If the sections won’t pry off then I move on to sections that will. Less work for me, I let the heating coils do the work. Then I take the sections of ice and toss them in the bucket. I keep moving around the freezer removing sections as they loosen. No puddles of water or emptying of the freezer here. Within twenty minutes the job is complete. I reset all the items that I have moved around and closed the door. The defrost switch gets put back into the off position automatically with the closing of the door and the freezer starts cooling again.
Conclusion
Any small sections of frost that fall to the bottom get left there. If I can’t reach them easily they stay there. They will eventually return to the top section as frost and get chipped off when I defrost the freezer again. Surely, you have heard of, “Don’t sweat the small stuff, when defrosting the chest freezer.”
The video at the right will show you how to defrost a manual defrost chest freezer with very little effort. A shop vacuum and some old blankets and quilts are all that is needed.
If you’re having freezer burn issues there may be something you can do. If you have an automatic defrost freezer you may be able to “turn off” the auto defrost. There may be a switch to turn it off inside the freezer. Check your freezer’s manual. It will cut your freezer burn problems.
Related Article: More Uses For the Freezer
(Mybusyretiredlife.com All Rights Reserved)
(Mybusyretiredlife.com All Rights Reserved)


